
Are you looking to add a personal touch to your quilting projects? Applique is a technique that allows you to embellish your quilts with intricate designs and shapes.
In this article, we will explore the process of applique on a quilt, from choosing suitable materials and designs to stitching the applique pieces onto your quilt top. Whether you are a beginner or an experienced quilter, learning how to applique can take your quilting skills to the next level and give your projects a unique and artistic flair. Let’s dive in and explore the world of quilting applique together!
Key Takeaways
- Select and prepare your appliqué design. Use templates for precise shapes and apply fusible web to the fabric’s back.
- Trace the appliqué design onto the fusible webbing. Then, cut out the shapes carefully with sharp scissors.
- Arrange the cut shapes on your quilt background. Experiment with placement for best composition and balance.
- Iron the appliqué shapes onto the quilt. Press firmly to ensure they adhere well and the edges are sealed.
- Stitch around the appliqué edges using a straight or zigzag stitch. Choose a thread that matches or complements the fabric.
Prepare All the Materials
To begin your appliqué project, you’ll need some essential materials:
- Fabric: Choose the fabric you want to applique onto your quilt. This can be cotton, linen, or any other fabric you choose.
- Quilt: Have your quilt top ready, either pieced together or a single piece of fabric.
- Fusible Web: This thin adhesive bonds two fabrics together when heat is applied.
- Scissors: Sharp fabric scissors for cutting out your applique shapes neatly.
- Iron and Ironing Board: To fuse the applique pieces onto your quilt.
- Thread: Matching threads for stitching around the edges of your applique pieces.
- Needles: Hand-sewing or sewing machine needles, depending on your preferred stitching method.
- Sewing Machine (optional): If you prefer machine stitching for your applique.
- Marking Pen or Pencil: To trace your applique shapes onto the fusible web or fabric.
How Do I Applique on a Quilt? A Step-by-Step Tutorial
Now that you’ve gathered your materials, let’s get started on your appliqué project.
Step 1: Choose an Appliqué Design
When selecting an appliqué design for your quilt, consider the size and complexity to ensure it complements the overall layout. Choose designs that match the theme or style of your quilt, creating a cohesive visual appeal.
Opt for easily recognizable shapes to add an interesting element to your project. It’s crucial to select colors and fabrics that enhance your design and blend well with the quilt’s overall color scheme.
Step 2: Prepare the Fabric
After selecting your appliqué design, it’s important to prepare the fabric properly. Start by choosing your fabric carefully, considering how the color, texture, and pattern will complement the overall design of your quilt. Before you move on, make sure to pre-wash and press your fabric. This step prevents shrinkage later and provides a smooth surface for easier application.
Step 3: Cut Appliqué Shapes
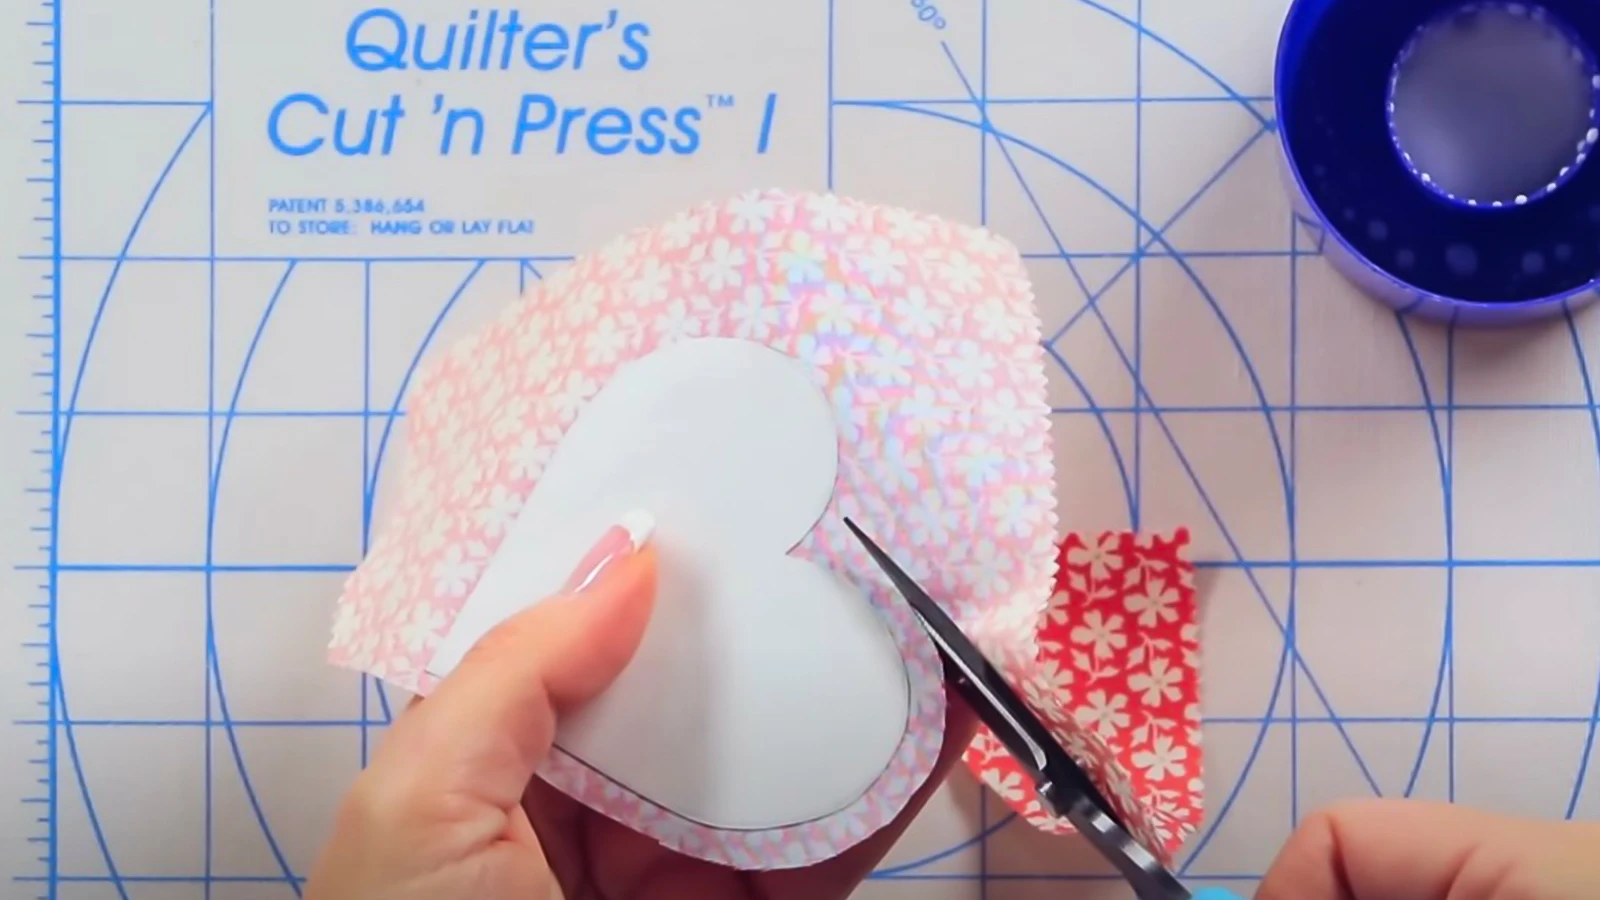
To start cutting your appliqué shapes, first trace the desired design onto fusible webbing. Use a pencil or fine marker to ensure the template is clear and precise. Once you’ve traced the design, carefully cut around the traced lines on the fusible webbing. This doesn’t have to be exact yet—just close enough to give you room to work when you attach it to the fabric.
Next, place the rough-cut fusible webbing onto the wrong side of your chosen fabric. Make sure it’s smooth and wrinkle-free before you press it with an iron. After securely attaching the fusible webbing, cut out your appliqué shapes precisely following the traced lines. This precision ensures your shapes will fit perfectly in your quilt design.
Step 4: Layout Design on the Background Fabric
Choose your layout design carefully, ensuring each appliqué piece is thoughtfully placed to enhance the quilt’s overall aesthetic.
Use a design wall or layout board to experiment with different placements. Ensure that the appliqué pieces are evenly spaced and visually appealing. Take your time adjusting and fine-tuning the placement of each shape. This step in quilting is about visual harmony and precision.
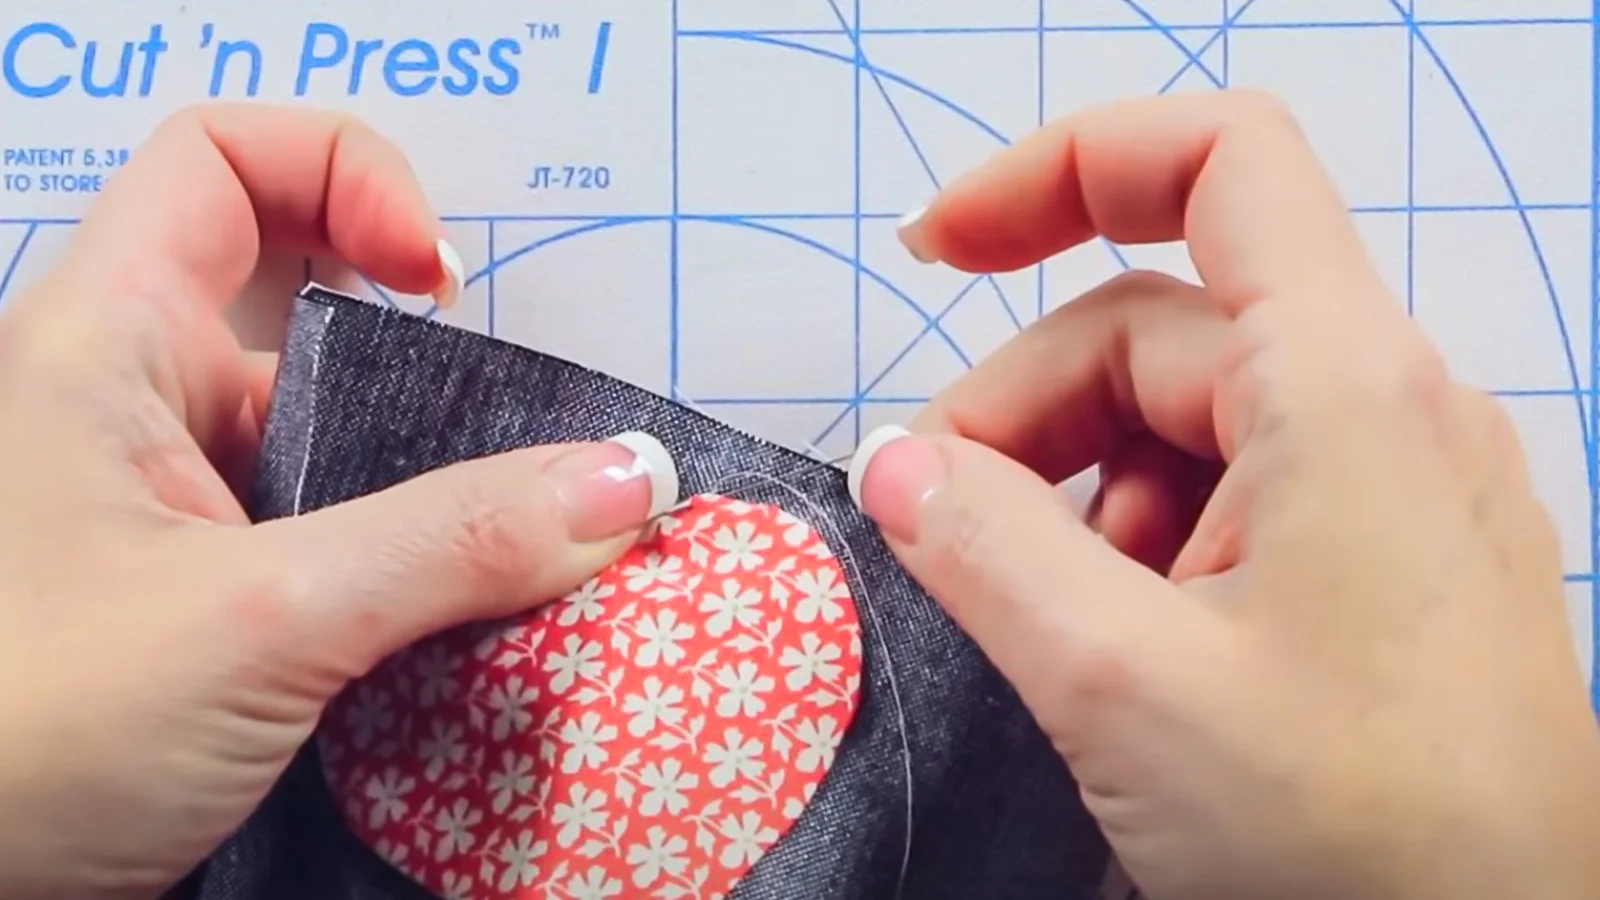
Step 5: Iron Appliqué Shapes onto Background Fabric
Once you’ve laid out your appliqué shapes, it’s time to iron them onto the background fabric. Peel off the paper backing. Arrange your shapes on the quilt background to your liking. Then, iron on firmly.
This method seals the raw edges of your shapes, preventing them from fraying and preparing them for later steps.
Step 6: Stitch Appliqué Shapes for Added Security
For added security, stitch around the edges of applique shapes using either a straight or zigzag stitch. This stitching method not only secures your fabric pieces but also protects the edges from fraying over time. Make sure your stitches are close enough to the edge to prevent any fraying yet far enough to catch all fabric layers effectively.
Choose thread colors that match your appliqué design for a seamless look without distracting from its intricate patterns.
Step 7: Finish the Quilt
You have a couple of options for finishing the quilt: quilting around or over your appliqué. Quilting around the appliqué pieces will give them a raised appearance, effectively highlighting each design element. This technique lets your appliqué stand out, adding depth to the overall look of your quilt.
Alternatively, quilting over the appliqué can increase the durability of your quilt. This method reinforces your design, integrating it more fully with the quilt top.
Choose your quilting strategy based on whether you want to emphasize the design or ensure it lasts through wear and tear.
Tips and Tricks for Successful Appliqué
To begin your appliqué journey, follow these tips and tricks for a successful applique.
Practice on Scrap Fabric First
Before diving into your main quilt project, it’s wise to practice different appliqué techniques on scrap fabric. This allows you to experiment with various fusible webs to find the best one that suits your style. You’ll also get a feel for how different thread colors enhance or clash with your fabric choices.
Don’t forget to try using a stabilizer behind your scrap fabric. It helps prevent the fabric from puckering and ensures a smoother finish, which is crucial for a polished look.
Use Sharp Scissors for Clean Cuts
Sharp scissors ensure that you’re not just hacking away at the fabric but rather slicing through it cleanly, which is essential for neat edges. This precision is necessary in appliqué work, where every detail can stand out.
Sharp scissors are not just about aesthetics; they also prevent the fabric from fraying, simplifying your sewing process and enhancing the durability of your work.
Experiment with Different Stitch Techniques
After ensuring your scissors are sharp for clean cuts, explore different stitch techniques to enhance your appliqué work on quilts.
You can start with a zig-zag stitch. It not only secures the edges of your appliqué quilt but also adds a charming decorative element.
A straight stitch is your go-to if you prefer a cleaner and more classic look. It’s straightforward and maintains the focus on your fabric shapes.
For a more dramatic effect, try echo quilting around your appliqué shapes. This technique creates a lovely outline that emphasizes the design while adding depth.
Alternatively, grid quilting offers a modern aesthetic by forming a structured background that complements the intricate details of your appliqué pieces.
Conclusion
Now that you’ve learned the basics of appliqué, it’s time to create your own quilt masterpiece. Remember to choose your designs thoughtfully, cut precisely, and iron carefully.
Don’t be afraid to experiment with different stitches and colors to truly make it your own. Above all, enjoy the process and take pride in the unique story your quilt will tell.
Happy quilting!
Explore more crafting projects at the Accessories-Wholesaler blog! Find your favorite iron-on patches at Accessories-Wholesaler!


