Hey there, hiking enthusiasts and puffy jacket lovers! Are you tired of seeing your favorite puffy jacket with tears and holes? Fret not! In this blog post, you will learn how to repair your beloved puffy jacket at home using simple techniques. Whether it’s a small tear, a pesky hole, or damaged seams, we’ve got you covered.
Let’s get started on this exciting journey of repairing and reviving our trusty puffy jackets. So grab your gear, and let’s dive in!
Assessing the Damage
Inspecting for tears, holes, or damaged seams
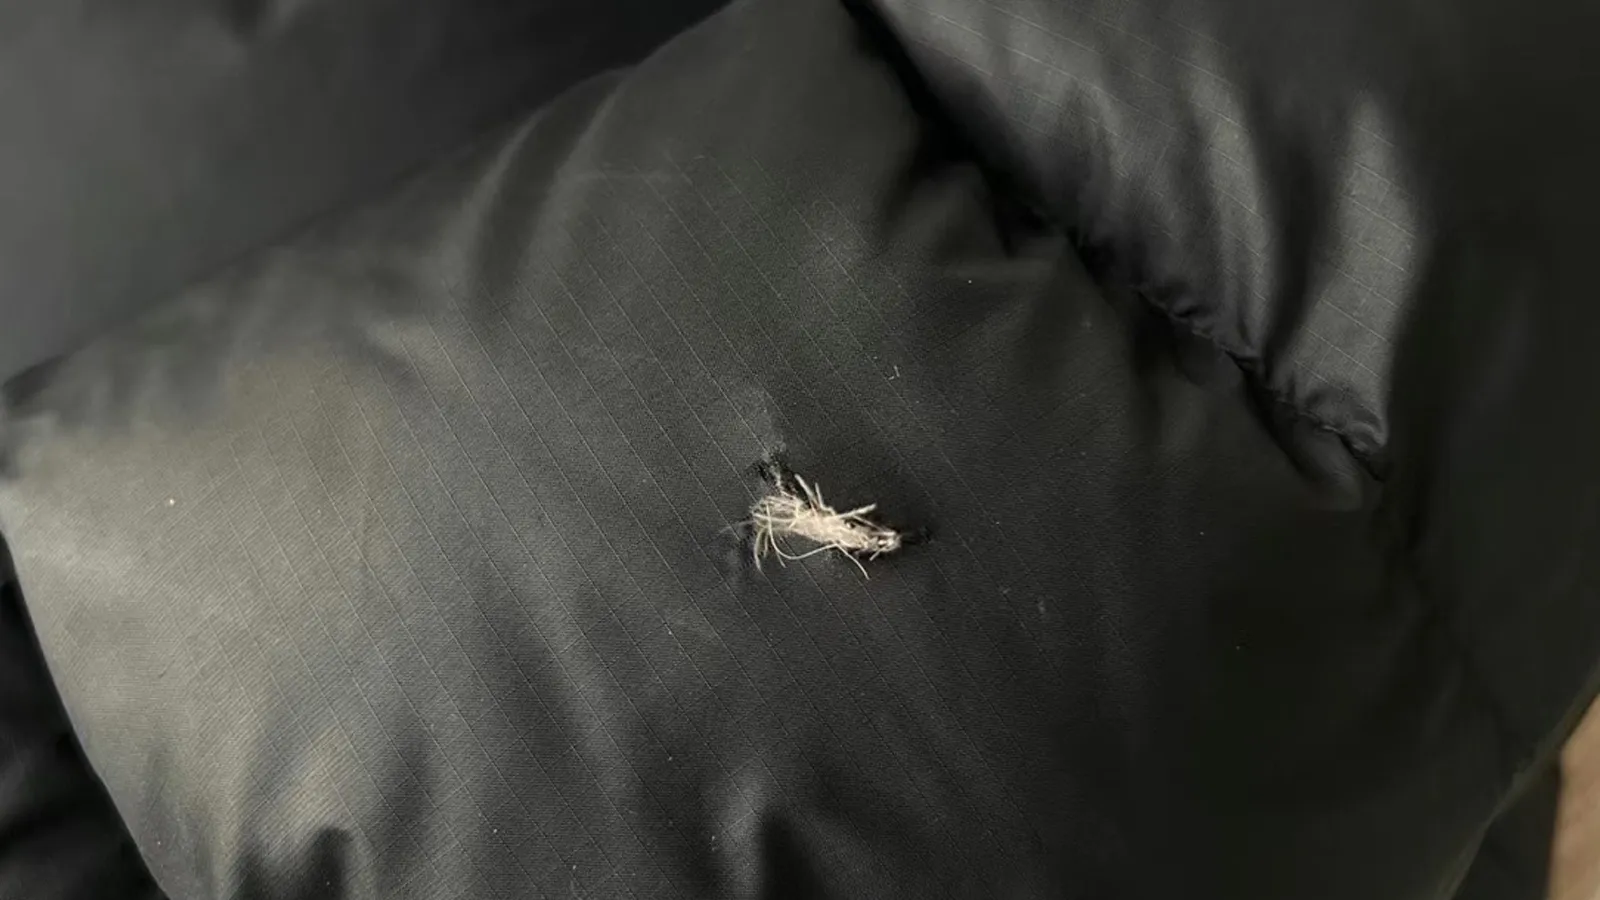
Now comes the fun part: inspecting your beloved puffy jacket for any signs of wear and tear. Lay it out on a flat surface and give it a good once-over. Look closely for any rips or tears in the fabric, especially around high-stress areas like the elbows and shoulders. Don’t forget to check the seams for any signs of unraveling or damage.
Inspecting your jacket under good lighting is crucial to spotting even the tiniest imperfections. Sometimes, a small pinhole can escape our notice. So take your time and be thorough in your examination.
Evaluating the damage to determine the repair method
Once you’ve identified all the problem areas, it’s time to assess their severity. Are they small tears that can be easily mended with a few stitches? Or are there larger rips or tears that require more extensive repair work using patches?
By evaluating the extent of the damage, you can determine which repair method will be most effective. This step is crucial as it sets the stage for a successful repair process tailored to address each issue with your cherished puffy jacket.
Gathering Materials
Before starting to repair your puffy jacket, gathering all the materials needed for a successful DIY repair is essential. Here’s a list of items you’ll need:
- Repair Patches: These are essential for fixing larger tears and holes in your puffy jacket. Look for high-quality patches that offer strong adhesion and durability. Alternatively, you can also use decorative patches to cover tears or holes.
- Needle and Thread: A trusty needle and durable thread are indispensable for stitching up small tears and reinforcing seams. To avoid causing further damage, make sure to use a needle suitable for the fabric of your jacket.
- Scissors: A good pair of scissors is crucial for cutting repair patches to size and trimming any excess thread after sewing.
- Gear Aid Tenacious Tape: This specialized tape is perfect for quick, on-the-go repairs. It instantly fixes small tears and rips, especially during outdoor adventures.
- Nylon Repair Kit: If the fabric of your puffy jacket is nylon, a nylon repair kit can come in handy. These kits typically include adhesive patches designed specifically for nylon materials.
Now that you’ve gathered everything you need, it’s time to roll up your sleeves and breathe new life into your beloved puffy jacket!
How to Repair a Puffy Jacket with Tears and Holes
A guide to repairing small tears and holes
So, you’ve discovered some small tears or tiny pinholes in your beloved puffy jacket. Not to worry! Here’s a simple step-by-step guide to help you mend those minor imperfections and restore your jacket to its former glory:
- Clean the Area: Before beginning any repair work, ensure the damaged area is clean and free of dirt or debris. This will allow for better adhesion when applying the patch.
- Prepare the Tape: Cut a piece of repair tape to size. Ensure it covers the damaged area fully, with some extra margin around the edges for secure adhesion.
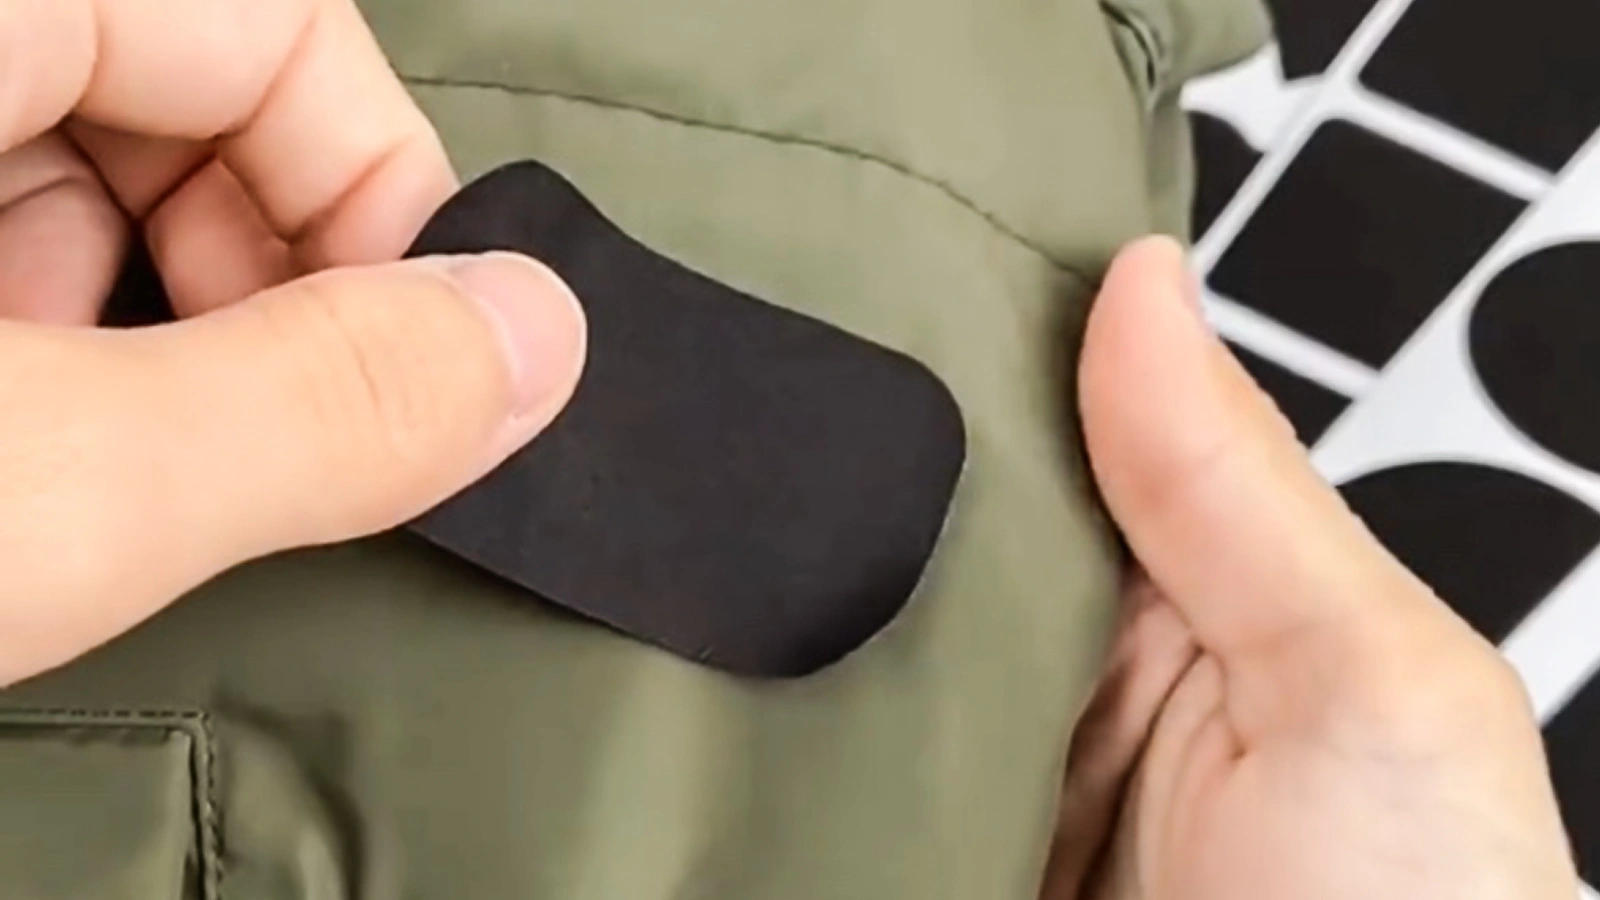
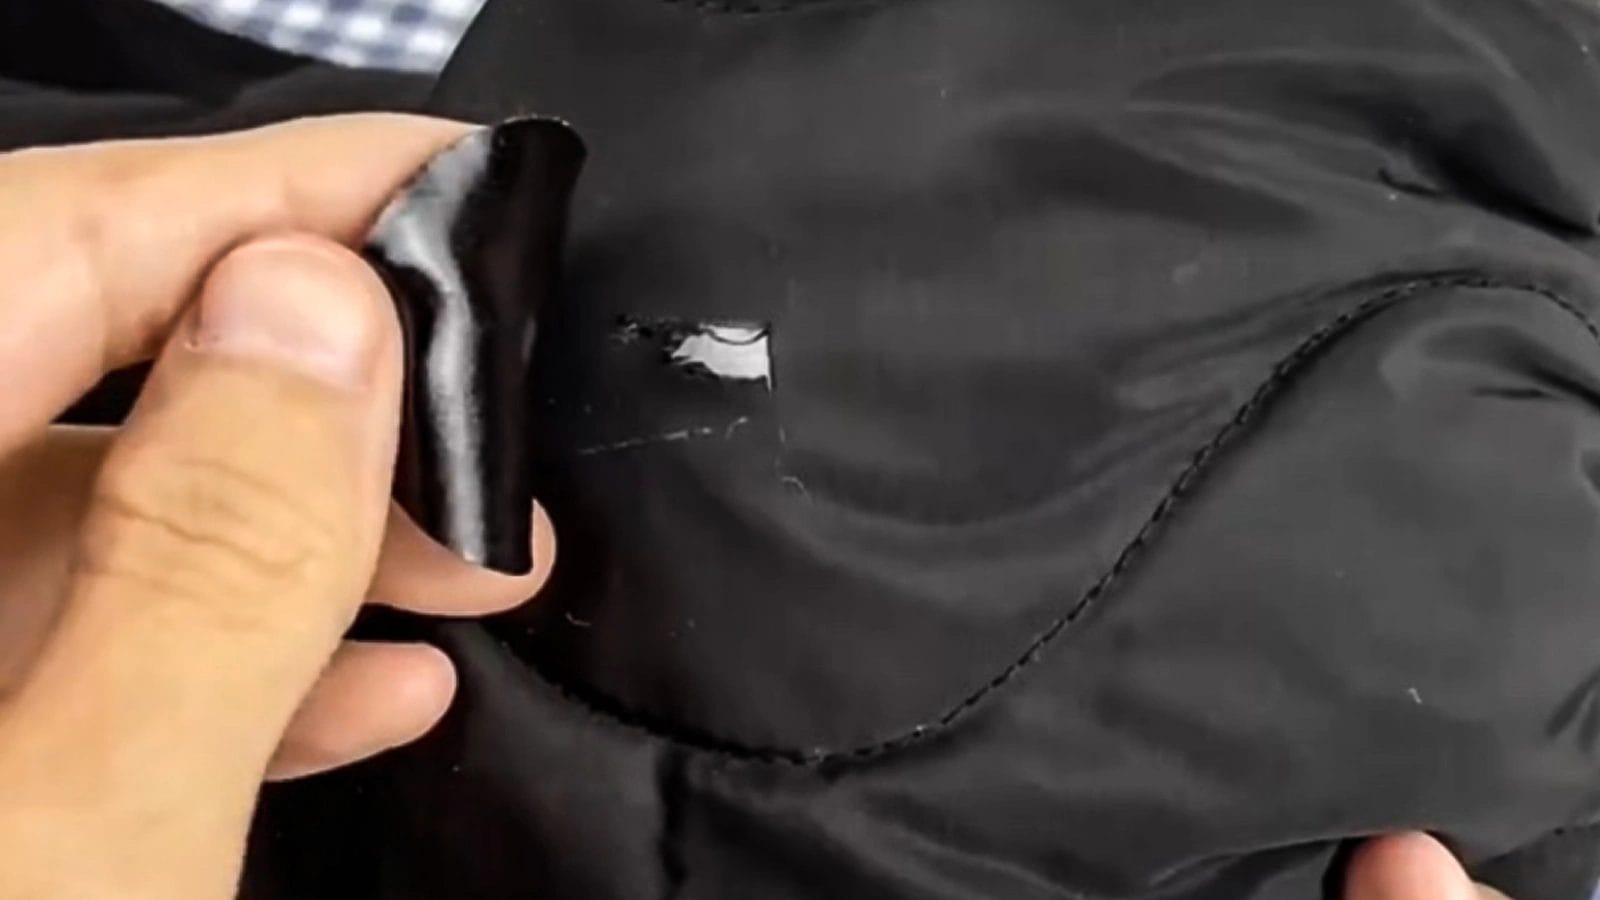
- Apply the Tape: Carefully place the tape over the tear. Make sure that it is centered and smoothly adhered to the fabric. Press down firmly to secure it in place.
- Smooth Out Any Air Bubbles: Run your fingers over the tape to smooth out any air bubbles or wrinkles, ensuring a seamless finish.
- Reinforce if Needed: For added durability, consider stitching around the edges of the tape using a needle and thread, especially if the tear is located in a high-stress area.
Following these steps can effectively repair small tears and pinholes in your puffy jacket.
Using repair patches to fix larger tears
For those larger tears or holes that require more extensive repair work, utilizing repair patches is key to restoring your puffy jacket’s integrity. Here’s how you can use repair patches to fix those larger tears:
- Select a Suitable Patch: Choose a durable and waterproof patch that matches the material of your jacket. Ensure it is large enough to cover the entire damaged area, with extra room around the edges.
- Cut a Patch to Size: Take a pair of scissors and cut the patch to fit over the damaged area. Leave space around the patch to ensure it sticks properly to the fabric.
- Apply Adhesive: If your patch comes with adhesive backing, peel off the backing and carefully apply it over the damaged area, smoothing out any air bubbles.
- Stitch for Extra Security: Consider stitching around their edges to reinforce larger patches for added strength and longevity.
Following these instructions, you can effectively use repair patches to mend larger tears in your puffy jacket.
How to Fix Seams
Identifying damaged seams
A keen eye is your best tool when identifying damaged seams on your trusty puffy jacket. Start by carefully examining the seams where different fabric panels are stitched together. Look for signs of fraying, loose threads, or areas where the stitching has come undone.
Pay close attention to high-stress areas such as the shoulders and sides. These are common hotspots for seam damage due to frequent movement and wear. Additionally, inspect the cuffs and hemline for any unraveling or weakened stitching.
To ensure a thorough inspection, gently tug the fabric around the seams to check for any give or separation. This will help you pinpoint any areas that require immediate attention.
Techniques for re-stitching seams
Reinforcing damaged seams through re-stitching is simple yet effective in breathing new life into your puffy jacket. Here’s a quick guide on how to tackle this repair task:
- Gather Your Supplies: Ensure you have a needle and thread that match the color of your jacket’s fabric. Opting for a matching color ensures that the repaired seams blend seamlessly with the rest of the garment.
- Thread Your Needle: Carefully thread your needle, making sure to knot it securely at one end. A single strand of thread will suffice for most repairs unless you are dealing with heavy-duty fabrics that need added strength.
- Start Stitching: Align the separated seam’s edges and carefully stitch along the original line using small, even stitches. Take care to match your stitching pattern with the original seam for uniformity.
- Secure Your Stitching: Once you’ve reached the end of the affected area, secure your stitching with a knot inside the jacket to prevent unraveling.
Employing these simple yet effective techniques can reinforce damaged seams and prolong the lifespan of your beloved puffy jacket.
How to Wash and Dry a Repaired Puffy Jacket
So, you’ve successfully repaired your beloved puffy jacket. Now it’s time to ensure it stays in top-notch condition for all your future adventures. Here are some essential tips on washing and drying your repaired puffy jacket:
- Use a Gentle Detergent: Opt for a gentle, down-specific detergent when washing your puffy jacket. This will help preserve the natural oils in the down insulation while effectively cleaning the garment.
- Machine Wash with Care: If washing by machine, use a front-loading machine on a gentle cycle with cold water. Avoid using top-loading machines with agitators, as they can damage delicate fabric and insulation.
- Avoid Fabric Softeners: Avoid using fabric softeners or bleach when washing your puffy jacket. These can interfere with the down’s natural loft and water-repellent properties.
- Rinse Thoroughly: Make sure you rinse the jacket thoroughly to get rid of all detergent residue.
- Tumble Dry Low: When drying your puffy jacket, use a low heat setting in the dryer, along with clean tennis balls or dryer balls to help fluff up the down insulation.
- Regular Maintenance: Consider washing your puffy jacket once or twice a year to remove accumulated dirt, body oils, and sweat that can affect its insulating properties.
By following these tips, you can effectively maintain the quality of your puffy jacket.
How to Store a Puffy Jacket
When storing your precious puffy jacket, taking the proper steps can significantly impact its longevity and overall condition. Here is some valuable advice on how to store your puffy jacket to prevent future damage:
- Clean Before Storage: Before stowing away your jacket, ensure it is clean and free from dirt or stains. This prevents the accumulation of grime and ensures that the fabric remains in top condition during storage.
- Avoid Compression: To maintain the loft and insulation of your puffy jacket, don’t compress it for extended periods. Store it in a breathable garment bag or hang it in a spacious closet.
- Dry Completely: After washing or exposure to moisture, make sure your puffy jacket is completely dry before storing. Any residual dampness can lead to mold or mildew growth during storage.
- Protect from Pests: Prevent insects from damaging your jacket by storing it with natural pest deterrents like cedar chips or lavender sachets.
- Store Away from Sunlight: Avoid storing your puffy jacket in direct sunlight. Prolonged exposure can lead to fabric discoloration and insulation deterioration over time.
By following these tips, you can ensure that your equipment remains in optimal condition and is ready for your next outdoor adventure.
Conclusion
When you start fixing and rejuvenating your puffy jacket, always remember the good it brings not just to your gear but also to the environment. Enjoy the feeling of achievement when you give new life to beloved outdoor gear while supporting a more sustainable and responsible way of fashion and consumption.
Now, gather your materials, roll up those sleeves, and let’s continue making a difference one stitch at a time!