
Over time, embroidered patches have become a popular way to personalize jackets. But there may come a time when you need to remove one. Whether you’re dealing with iron-on patches or sew-on patches, the key is to approach the task with care to avoid damaging the fabric of your jacket.
Iron-on patches typically require heat to loosen the adhesive before peeling them off. You might also need an adhesive remover to remove any sticky residue left behind. On the other hand, removing sew-on patches involves carefully cutting the stitches without nicking the fabric underneath.
No matter the method, it’s crucial to proceed gently to ensure that your jacket remains in good condition, ready for a new patch, or worn as is.
Key Takeaways
- Use a seam ripper to cut the threads while carefully holding the embroidered patch.
- Gently pull the patch away from the fabric. Use tweezers to remove any remaining threads.
- For iron-on patches, apply heat with an iron to loosen the adhesive before peeling off the patch.
- After removal, check for any adhesive residue and clean the area accordingly.
- Wash the jacket following its care instructions to ensure no damage from the removal process.
Preparation
Before you start the removal process, getting your tools ready is crucial. Also, take a moment to evaluate your jacket’s patch and fabric to determine the best approach.
Gather the Necessary Tools
Before removing an embroidery patch from a jacket, you may need the following tools:
- Seam ripper: Used to carefully cut the threads holding the patch in place without damaging the fabric.
- Tweezers: Helpful for picking out loose threads or removing any stubborn stitches.
- Scissors: Use sharp scissors to trim any excess threads after removing the patch.
- Iron (optional): If the patch is iron-on, you may need an iron to heat and loosen the adhesive for easier removal.
- Hairdryer (alternative to iron): Instead of an iron, you can use a hairdryer to heat the patch and loosen the adhesive.
- Adhesive remover (if needed): If an iron-on patch leaves residue behind, an adhesive remover can help clean the area.
- Fabric marker or chalk (optional): To mark the area where the patch was located for repositioning or repair purposes.
Assess the Patch and Fabric
Assessing your jacket’s fabric and the patch’s backing is crucial to choosing the safest removal method. Start by checking the patch’s backing to see if it’s iron-on or sew-on. This will determine the techniques and tools you’ll need.
Then, examine the fabric of your jacket, especially its heat tolerance. This is vital if you’re considering using a heat-related method. Also, keep an eye out for any extra embellishments or stitching around the patch that may impede its removal. The size and intricacy of the patch can also influence your choice of removal method.
How to Remove Stitched Embroidery Patches
When removing stitched embroidery patches, first carefully cut the threads with a seam ripper. After detaching the embroidery, inspect the area for any residual threads.
This process requires patience and precision, but it’s crucial for maintaining the integrity of your garment.
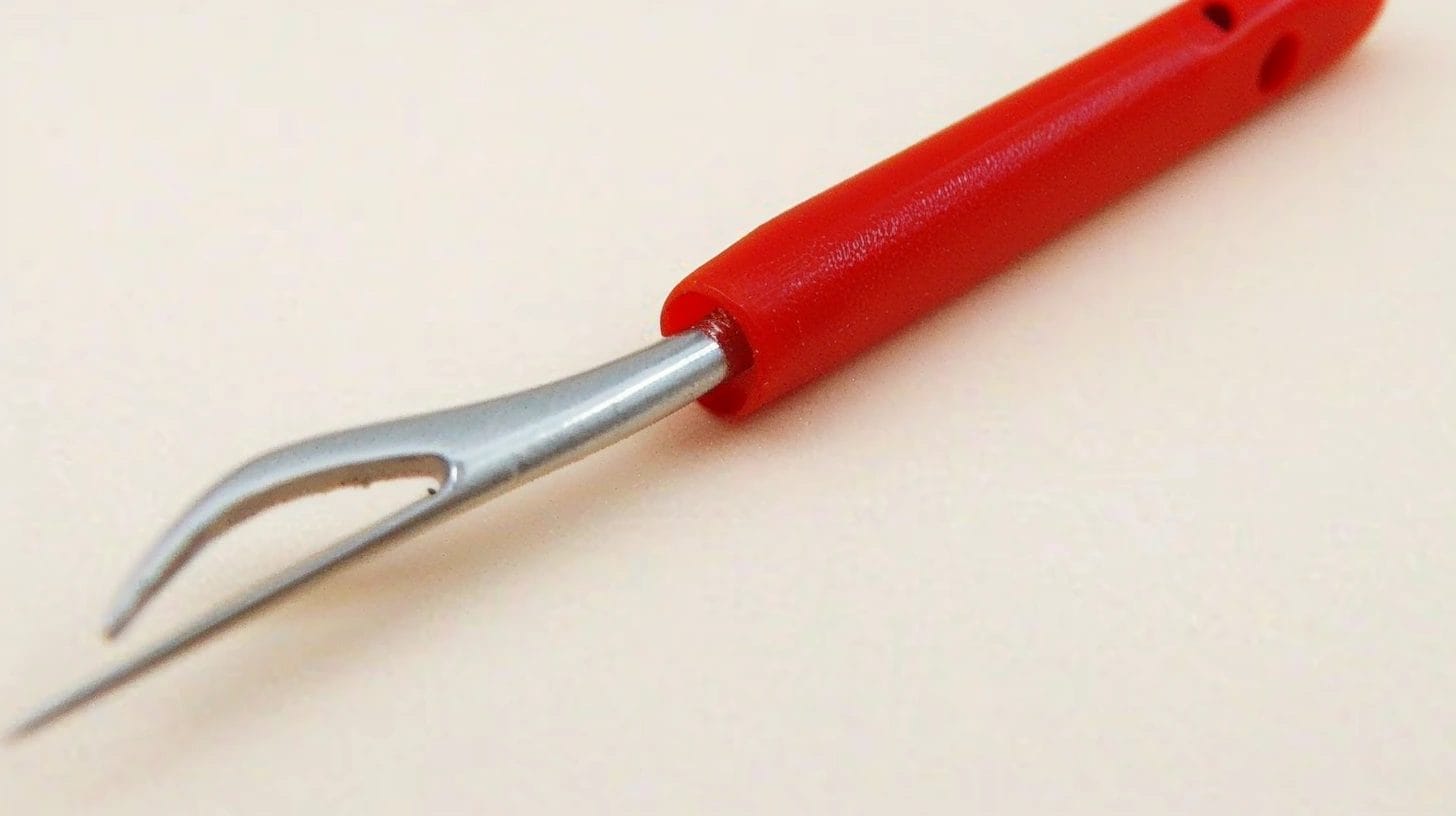
Step 1: Use a Seam Ripper to Cut Threads
A seam ripper is the perfect tool for removing an embroidered patch from your jacket without damaging the fabric. This specialized tool allows you to precisely cut and remove individual stitches without harming the surrounding material. Simply slide the seam ripper under each stitch, snipping them one at a time until the patch becomes loose.
Once you’ve removed the stitches, some threads may still remain. Tweezers can help with this part of the process. They allow you to pluck out any remaining threads.
Step 2: Inspect and Address Residual Threads
After removing the embroidered patch, carefully check the area for any remaining threads that require removal or trimming.
Small threads may remain stuck in the fabric even after you’ve cut and removed the main part of the embroidered patch. If necessary, use good lighting and magnifying glass to spot these tiny leftovers. Gently use tweezers to pluck out any threads you find.
This step is crucial for a clean finish, ensuring that no remnants of the patch spoil the look of your jacket. It’s all about precision—carefully inspect every inch where the patch was attached to ensure you’ve got every last thread.
How to Remove Iron-On Embroidery Patches
To remove an iron-on embroidery patch, heat it with an iron or hairdryer to loosen the adhesive.
Next, carefully peel off the patch, ensuring it does not damage the fabric underneath.
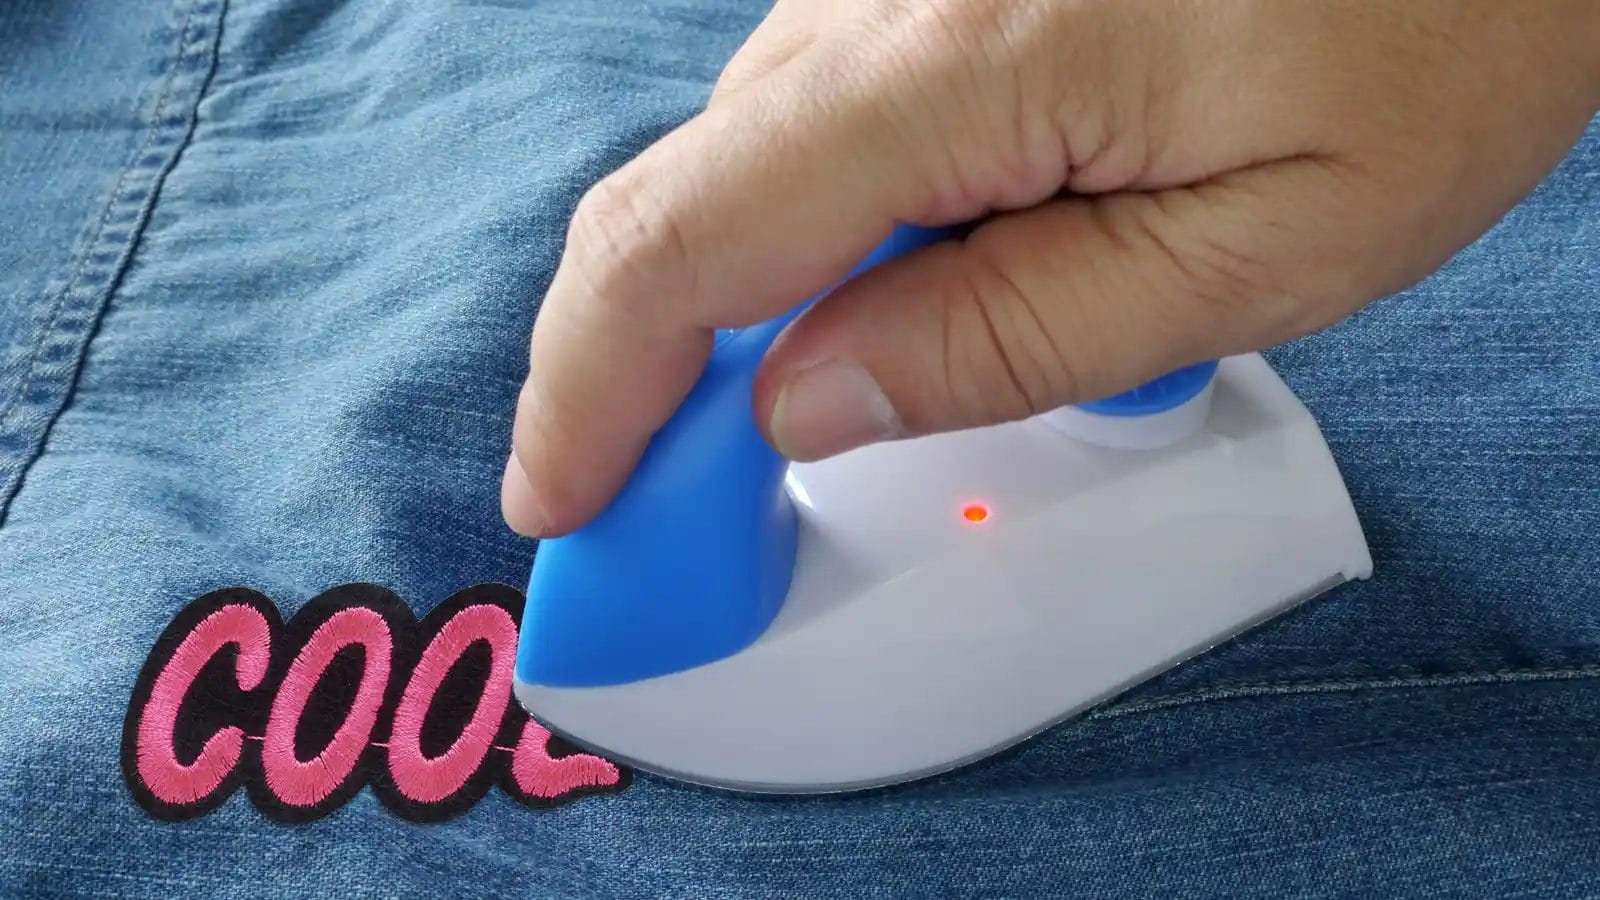
Step 1: Apply Heat with an Iron or Hairdryer
Applying heat with either an iron or a hairdryer is a tried-and-true method for removing iron-on patches from jackets. When using an iron, the heat softens the patch’s adhesive, making it easier to peel off. It’s crucial to place a protective barrier, like wax paper, between the iron and the patch to prevent damage to the jacket fabric.
Alternatively, if you’re using a hairdryer, the direct heat can also soften the adhesive without needing an iron.
Step 2: Peel off the Patch Gently
Gently peeling off an iron-on embroidered patch starts with tweezers carefully lifting the edges without harming the jacket’s fabric. You’ll want to be patient and steady to avoid tearing the patch or leaving any adhesive residue behind.
Once you’ve successfully lifted an edge, continue to work slowly around the patch. If the adhesive proves stubborn, apply a bit of heat with an iron over a cloth or wax paper to soften it, making the peeling process easier.
Step 3: Remove Adhesive Residue
After removing your iron-on patch, you’ll often find sticky adhesive residue clinging to the fabric, demanding immediate attention for a clean finish.
To tackle this, apply a commercial adhesive remover directly to the problematic area. This step is crucial to loosening the residue’s grip on your jacket.
Next, gently wash the fabric spot with liquid detergent. This method aids in ensuring a thorough and clean removal of any lingering stickiness.
You might need to repeat these steps until you achieve a smooth and clean surface.
Step 4: Repair Any Damage or Holes
If you’ve found any damage or holes, don’t worry. You can cover these imperfections with a fabric or iron-on patch that matches your jacket’s color and texture.
To secure the patch, either apply fabric glue or sew it onto the damaged area. This step not only repairs but also prevents further wear and tear.
Lastly, allow the repaired area to fully dry or set according to the instructions before wearing the jacket again. This patience ensures your repair holds up over time.
Related: 6 Best Methods on How to Remove an Iron on Patch
Conclusion
In conclusion, removing an embroidered patch from your jacket isn’t as tricky as you might think. Whether it’s stitched or ironed on, with the right tools and a bit of patience, you can get rid of it without leaving a mark.
After carefully cutting the stitches or applying heat to peel them off, don’t forget to clean and restore the jacket to its former glory. Now, you’re all set to either enjoy the original look or customize it with a new patch that reflects your current style.