
You’ve found the perfect patch, but how to iron on patches? Ironing on patches is simpler than you think, and you’re about to master it.
In this blog post, we’ll walk you through 10 specific steps to ensure your patches hold tight and look great. Whether it’s for style or repair, you’ll be ironing like a pro in no time.
Grab your iron, and let’s get started!
Types of Fabric Patches
Before you grab your iron and get to work, you’ll need to choose the right type of patch for your project.
Whether you’re looking for durability, a specific design, or a particular application method, there’s a variety of patches to meet your needs.
Let’s explore the most common types and what makes each unique for your garments.
Most Common Types of Patches
Embroidered patches are the most prevalent types of fabric patches you’ll encounter when planning to iron them onto your garments.

Embroidered patches boast thick stitching that gives a raised, textured effect. They are perfect for bold designs and traditional looks. They’re durable and have a classic charm that’s hard to beat. Of course, there is more than one type of patch. There are also chenille, rhinestone, sequin, and many other patches.
Comparisons between Different Types of Patches
You’ll find that each type of fabric patch offers varying levels of durability, unique design possibilities, and specific methods for application.
Embroidered patches are known for their longevity and classic look. They are perfect for garments that undergo frequent washing. They’re usually applied with an iron or a sewing machine.
On the other hand, printed patches allow for more intricate designs with a wide range of colors, though they may fade faster than their embroidered counterparts. These are often ironed on as well, but the heat-sensitive adhesive mightn’t bond as strongly to certain fabrics.
Chenille patches boast a textured, vintage feel, ideal for letterman jackets. They are usually sewn on to ensure they endure the test of time.
Choose your patch type based on where you’ll apply it and what level of durability you need.
How to Select the Right Patch
Choosing the right iron patch isn’t only about style. It’s about compatibility and placement. You’ll need to consider the material of your garment as well as the patch’s fabric to ensure a seamless blend.
Consider where on your item the patch will make the most impact and adhere well.
Tips for Selecting Patches
Before you heat up your iron, it’s crucial to select a patch that best suits your garment’s style and fabric. Consider the material of the patch. Embroidered patches offer a classic look and tend to adhere well. Leather or PVC patches add a unique texture but may need special care.

Make sure the patch’s size is proportionate to where you’re placing it. Too large, and it’ll overwhelm. Too small, and it might get lost.
Color is key as well. You’ll want something that complements or strikingly contrasts the garment, depending on the statement you’re aiming for.
At last, think about the patch’s edge. A merrowed border can frame the design nicely. But a hot-cut edge allows for more intricate shapes. Choose wisely for the best final look!
Insights into Patch Placement
After selecting your ideal patch, you’ll need to consider its placement on the garment. This will ensure it complements the item’s style and function. Think about the message you’re sending with your patch. Is it a badge of honor on a sleeve, a statement on the back of a jacket, or a fun accent on a pocket? You’ll want it to stand out but not interfere with the garment’s design or restrict movement.
Gather the Necessary Materials and Tools
To successfully iron on the patch, you’ll need to collect the essential tools for the task at hand.
- First off, grab a flat, heat-resistant ironing board to create a stable surface for your work.
- A standard home iron is the next crucial item. Ensure it’s clean and can operate without water or steam for this process.
- You won’t get far without the patches themselves, so choose designs that suit your style and the material you’re applying them to.
- It’s also wise to have a thin cloth or a lightweight towel at hand. This will serve as a protective layer between the patch and the iron to prevent scorching.
- Keep a pair of scissors close by to trim any loose threads from the edges of the patch for a neat finish.
- Additionally, you might need a ruler or a tape measure to help with precise placement, ensuring everything is aligned just right.
- Lastly, don’t forget a piece of chalk or a fabric marker to lightly mark the area where the patch will go. It can be a lifesaver for keeping things straight.
With these tools ready, you’re set to move forward with confidence.
Learn How to Iron on Patches: 10 Specific Guidelines
Now that you’ve got your tools ready, it’s time to focus on the actual process of ironing on your patch. Let’s learn the step-by-step iron-on patch instructions.
1. Check the Fabric of the Garment
Before applying an iron-on patch, ensure that you’re working with a fabric that can withstand the heat from an iron. Not all materials are suitable for this process, and using high heat on delicate fabrics can cause damage. Check the garment’s care label for ironing instructions. If it says ‘do not iron’ or has a low heat setting, it’s a red flag.
Most denims, cottons, and polyester blends are safe bets. But you’ll want to avoid sensitive fabrics like nylon, silk, or rayon. If you’re unsure, test a small, inconspicuous area first.
2. Identify the Type of Patch
After checking your garment’s fabric, you’ll need to determine what kind of iron-on patch you have. Different types may need specific heat settings or application techniques.
It’s crucial to read any instructions that come with your patch. If there aren’t any, a quick online search for the patch type can yield the needed information. Knowing your patch’s material ensures you don’t ruin it or your garment during application.
3. Decide Where to Place the Patch
Placement strategy is key when you’re ready to iron on a patch. Ensure it aligns with your garment’s design and your personal style.
Start by laying out your garment and positioning the patch where you’d like it to go. It’s crucial to consider the fabric’s stretch and how the garment wears. Keep in mind that areas like elbows and knees are prone to bending and may cause the patch to wrinkle or peel off over time.
Take a step back to look at the whole effect. Is the patch too high or too low? Does it enhance the garment’s appearance? You might want to try different placements until you find the perfect spot. Once you’re satisfied, you’re ready to move on to the next step.
4. Set the Clothes on a Flat, Heat-Proof Surface
Once you’ve planned where your patch will go, set your garment on an ironing board or a similar heat-resistant surface to prepare for application. Make sure the surface is sturdy and can withstand the high heat of an iron without warping or burning. It’s crucial that the surface is flat; any bumps or unevenness can lead to a poorly attached patch.
Smooth out the fabric of the garment to remove any wrinkles that might interfere with the patch adhering evenly. You’re aiming for a seamless bond. So any creases could cause the patch to not stick properly or look skewed once it’s ironed on. Take a moment to ensure everything’s perfectly in place before you move on to heating the iron.
5. Position the Patch Where Desired
Carefully position your patch on the garment, using a ruler or tape measure to ensure it’s exactly where you want it before applying heat. If you’re eyeing a spot over a pocket or near a seam, double-check the placement to avoid any misalignment. Remember, once you’ve ironed it on, repositioning can be a hassle or even impossible without damaging the fabric.
6. Preheat the Iron
Now that your patch is securely positioned, it’s time to preheat your iron to the appropriate setting. If you’re attaching your patch to cotton or denim, you’ll want a higher heat setting. For more delicate fabrics like polyester or silk, stick to a lower heat setting to avoid damage.
Don’t rush this step. A properly heated iron is crucial for the adhesive to activate and set the patch firmly in place. Wait until the iron is fully heated. This could take a few minutes. Remember, the iron should be hot enough to do the job but not so hot that it scorches your fabric or melts the patch.
7. Cover the Patch with a Thin Towel
Before you apply heat, cover the patch with a thin towel to protect both the fabric and the design. This crucial step prevents the direct contact of the hot iron with the patch, which could otherwise lead to melting or distortion. You’ll want to choose a towel that’s light enough to allow the heat through but sufficiently robust to shield the patch’s surface.
Make sure the towel is smooth and free of any wrinkles that could transfer to the patch. Lay it flat over the area, ensuring it’s completely covered. This barrier not only safeguards the patch but also minimizes the risk of scorching your garment. It’s a simple yet effective way to ensure your patch adheres without any damage.
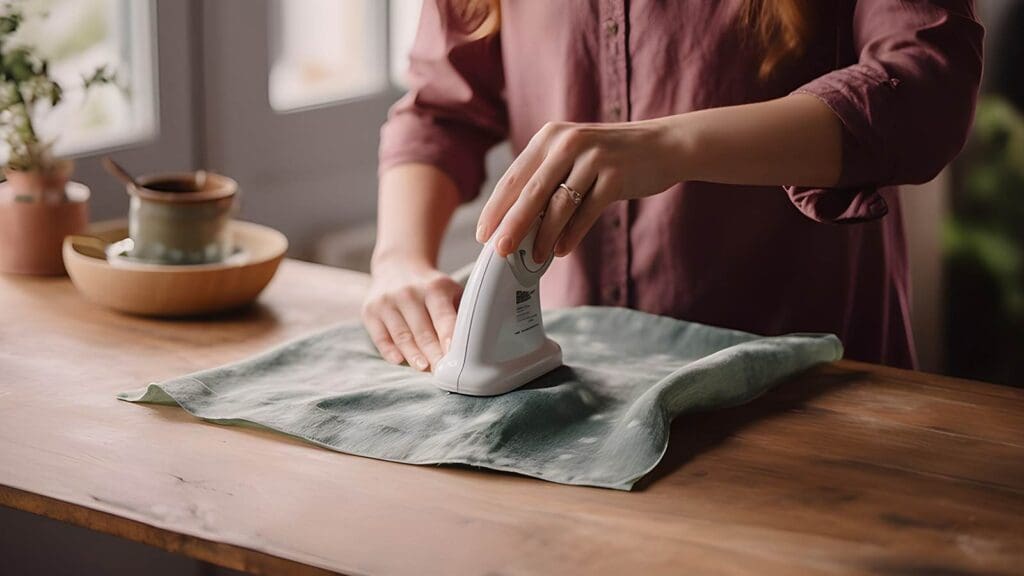
8. Press the Iron onto the Patch Firmly
Once you’ve covered the patch with your protective towel, place the hot iron on it firmly. Apply steady pressure for the duration specified in the patch instructions. This step is crucial as it activates the adhesive back of the patch, ensuring a secure bond to the fabric.
Don’t move the iron around as you might with regular ironing. Instead, press down without sliding to avoid misplacing the patch. If you’re unsure of the timing, check the packaging—usually, it’s about 30 seconds to 45 seconds for a thorough fix. Remember, the heat needs to penetrate through the towel, so patience is key.
9. Remove Iron and Let the Patch Cool down
After pressing the patch with the iron, set it aside and allow the fabric to cool. Don’t rush this step. The heat’s just worked its magic; now patience plays its part. Touching or moving the patch too soon could cause the edges to lift or the adhesive to smear, ruining your hard work.
Wait a solid few minutes. This isn’t the time to be hasty. You’re giving the glue a chance to harden and bond with the fabric. Think of it like letting a cake set after baking; it’s crucial for the best results.
Once it feels cool to the touch, check the edges. If they’re smooth and firmly in place, you’ve nailed it!
10. Test the Adhesion
While you wait for the patch to adhere, gently tug at the edges to ensure it’s securely attached to the fabric. This step is crucial because you don’t want your hard work to go to waste with a patch that peels off after the first wear.
Be gentle, though. If the patch hasn’t cooled down completely, you might displace it. If you notice any loose edges, it’s a sign you’ll need to apply more heat.
Place the iron over the patch again, and press down for a few more seconds. Make sure to cover the entire area, especially the edges.
Always check the patch’s adhesion after every ironing session until you’re confident it’s fully attached.
Caring Tips for Your Patches
To ensure your patches remain attached and vibrant, you’ll need to follow proper maintenance techniques.

After ironing them on, give them time to cool and set before you wear or wash the item.
When it’s time to clean, turn the garment inside out to protect the patch from direct contact with other clothes and the washing machine drum. It’s best to use cold water and a gentle cycle to prevent the edges from fraying or the patch from peeling. Avoid harsh detergents and bleach, as these can fade the colors and weaken the adhesive.
If you’re dealing with a particularly dirty patch, spot-clean it with a soft, damp cloth. Don’t scrub too hard, or you might damage the stitching or design. When drying, skip the tumble dryer. High heat can melt the adhesive, causing your patch to come loose. Instead, lay the garment flat or hang it to air dry.
If you must iron the item again, don’t apply the iron directly to the patch. Use a pressing cloth over the patch to provide a protective barrier. Remember to keep the iron on a low setting.
With these tips, your patches should stay in great shape for years to come.
Conclusion
Now you’ve got the know-how to jazz up your gear with iron-on patches! Remember the golden rules: pick the right patch, prepare your materials, and follow those 10 guidelines.
And when you’re done, treat your newly-decked threads with care. With a bit of practice, you’ll be a patch pro in no time.
Go ahead and show off your style. Personalize your one-of-a-kind creation!


