Ironing letters onto a shirt is a straightforward and creative way to personalize your clothing. Whether you’re customizing a T-shirt for a special event, making a unique gift, or simply adding some flair to your wardrobe, ironing on letters can be done with just a few tools and a bit of patience.
This DIY guide will walk you through the essential steps to ensure your letters adhere properly and look great. Let’s get started!
Key Takeaways
- Wash and thoroughly iron the shirt to remove any wrinkles.
- Lay the shirt flat on a hard surface and align it using a ruler.
- Arrange the iron-on letters, ensuring even spacing and proper alignment.
- Cover the letters with parchment paper or thin cloth to protect them.
- Apply even pressure with the iron for 10-15 seconds, then let the garment cool.
Gather the Materials and Tools
To get started, you’ll need to gather some essential materials and tools:
- Iron-on Letters
- Shirt (Cotton works best)
- Iron
- Ironing Board or Flat Surface
- Parchment Paper or Thin Cloth
- Scissors (if needed)
- Ruler or Measuring Tape (optional, for alignment)
Now, you’re ready to move on to the next steps of the process.
How to Iron Letter on a Shirt: Step-by-Step Instructions
To get started, wash and iron your shirt to remove any wrinkles. Next, position the shirt on a hard, smooth, heat-resistant surface. Then, arrange the letters, cover them, and iron them carefully to ensure they stick well.
Step 1: Wash and Iron Your Shirt
Start by washing your shirt to eliminate any dirt or residue that could interfere with the iron-on letters’ adhesion. Use a mild detergent and avoid fabric softeners, which can leave a residue that prevents the letters from sticking properly.
After washing, dry the shirt completely. Any moisture left in the fabric can cause the letters to peel or bubble.
Next, iron your shirt. This step is crucial because it creates a smooth surface for the letters to adhere to and removes any wrinkles that could distort the design. Make sure the entire shirt is wrinkle-free by ironing it thoroughly.
Step 2: Position the Shirt
Begin by laying your shirt flat on a hard, heat-resistant surface to ensure a smooth and stable base for the letters. Make sure the shirt is even and free of wrinkles to avoid crooked letter placement.
This careful preparation will help you achieve a polished and well-aligned result.
Step 3: Arrange the Letters
Once you’ve ensured your shirt is wrinkle-free and properly aligned, it’s time to arrange the letters meticulously.
Begin by placing the iron-on letters on the fabric. Use a ruler to line up the letters, ensuring they’re straight and evenly spaced across the shirt.
Double-check the alignment from different angles to avoid any skewed lettering.
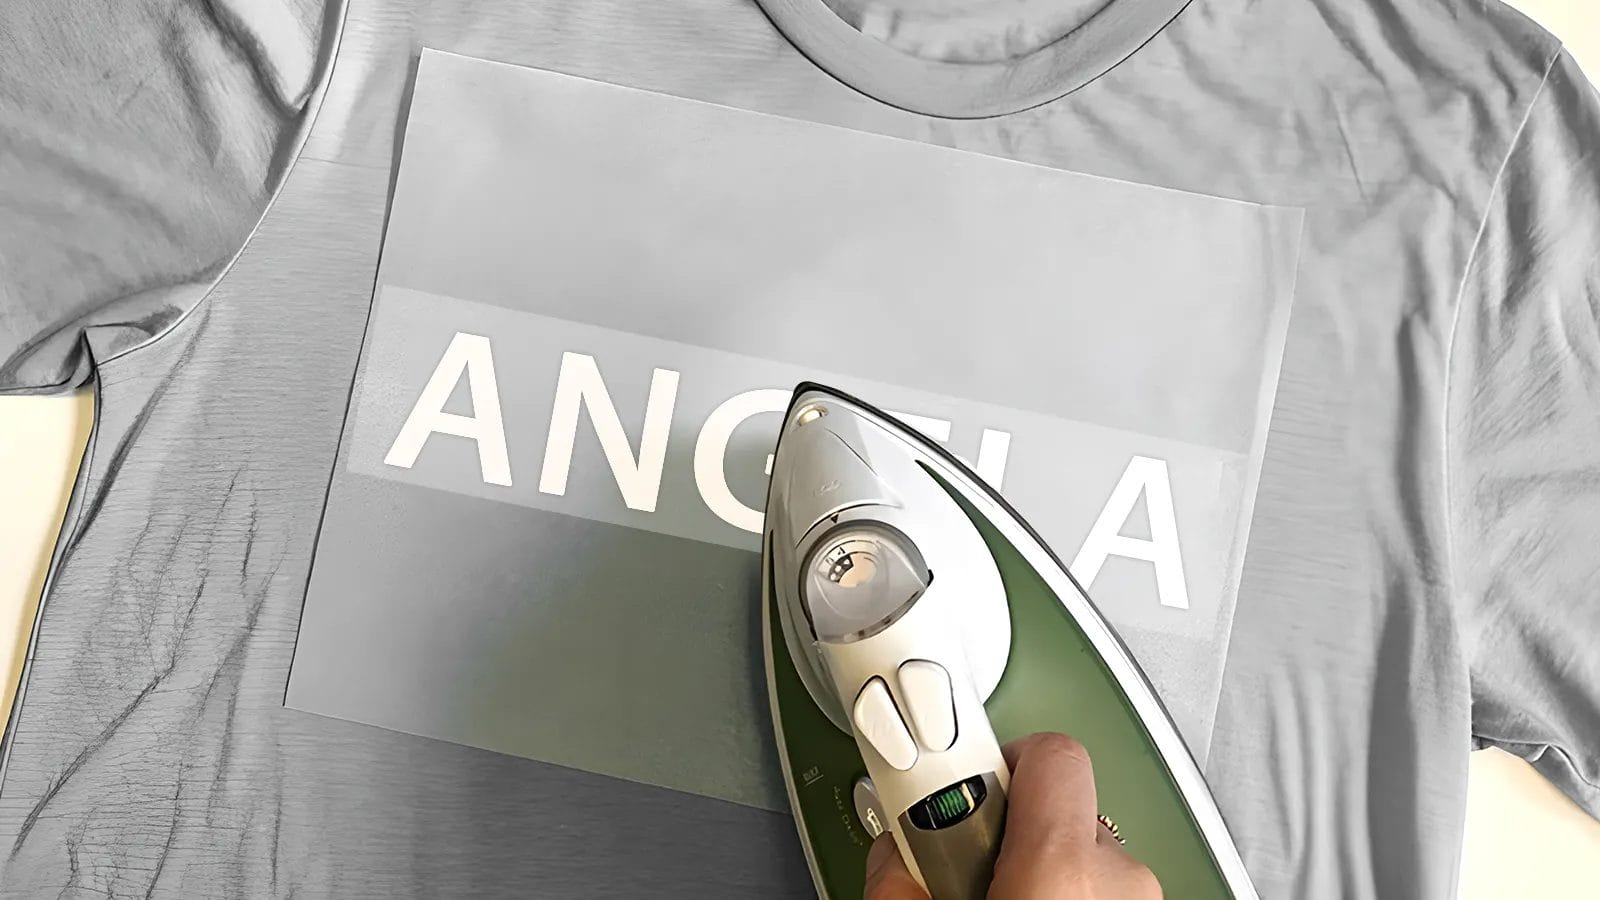
Step 4: Cover and Protect
Cover the arranged letters with parchment paper or thin cloth to shield them during the ironing process. This step is crucial to protecting the iron-on letters from direct heat and ensuring they don’t get damaged.
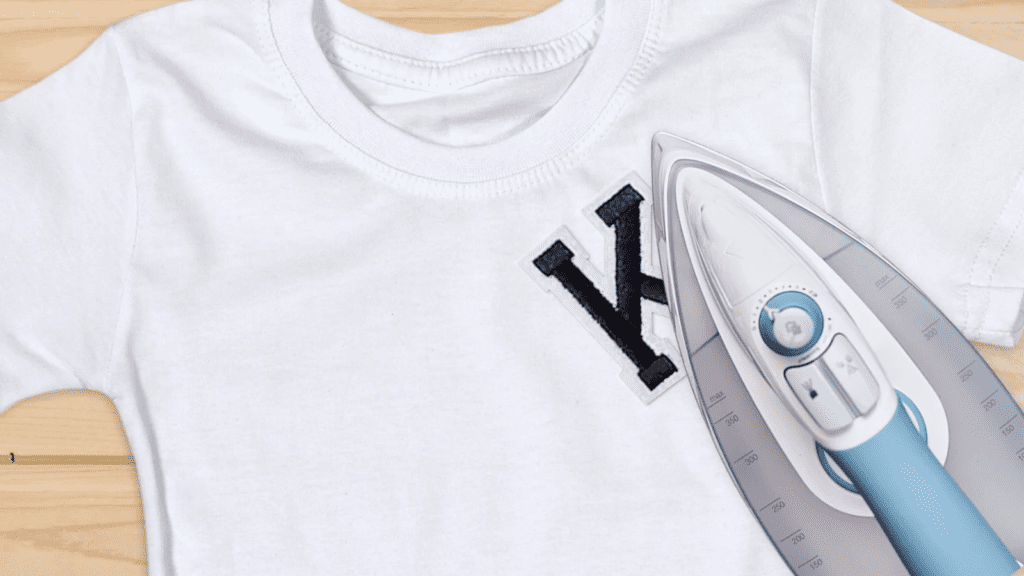
Step 5: Iron the Letters
Start by placing the iron over the first letter and applying firm, even pressure for about 10-15 seconds.
Move the iron from the middle of the letter outward to avoid creating air bubbles. Repeat this process for each letter, ensuring you apply consistent pressure and heat evenly.
Once you’ve ironed all the letters, let the garment cool for 2-3 minutes before removing the protective cover. This cooling step is crucial, as it helps the letters adhere properly to the fabric.
Step 6: Check and Reapply Heat if Needed
After ironing, inspect the letters closely for any edges or corners that mightn’t have fully adhered. If you notice any parts of the letters peeling or not sticking well, it’s time to reapply heat. Place a cloth over the letters again and iron for another 10-15 seconds. Make sure you press firmly and evenly to ensure proper adhesion.
Proper adhesion is crucial for durability, so take your time to get it right.
Caring Tips for Ironed Letters
To keep your ironed-on letters looking fresh, turn your shirts inside out before washing them. Follow the manufacturer’s care instructions to ensure longevity. Use mild detergents and avoid bleach, which can damage the letters.
When it comes to drying, air dry your shirts or use a low heat setting in the dryer to prevent peeling or cracking. Handle the shirts gently to maintain the quality of the ironed letters. If you need to iron the shirt again, place a cloth over the letters to protect them from direct heat.
Conclusion
You now know how to iron letters on a shirt easily. Gather your materials, follow the simple steps, and you’ll have a personalized shirt in no time.
Don’t forget to turn it inside out when washing, use mild detergents, and air dry or use low heat to keep the letters looking sharp.
Handle your shirt gently to maintain its quality, and you’ll enjoy your custom creation for a long time.
Happy ironing!
Explore more patch ideas at the Accessories-Wholesaler blog! Find your favorite iron-on patches at Accessories-Wholesaler!
FAQs
How Do I Iron Text Onto Fabric?
To iron text onto fabric, place the letters face up on 100% cotton, cover with tissue paper, and press with firm pressure. Iron from the middle outwards, cool the fabric, then wash and dry to set.
How to Do Iron on Prints on Shirts?
To iron prints onto shirts, first, choose a 100% cotton shirt. Arrange the print, cover it with tissue paper, and iron it with firm pressure. Let it cool, then remove the paper. Follow any included instructions for the best results.
Why Won’t My Iron on Letters Stick?
Your iron-on letters aren’t sticking because you might not be using enough heat or pressure. For the best results, ensure the fabric is 100% cotton, pre-wash the shirt, and follow the specific instructions.
Can I Wash a Shirt With Iron on Letters?
Yes, you can wash a shirt with iron-on letters. Turn it inside out, use cold water, and avoid fabric softeners. This helps preserve the letters and prevents them from peeling or fading. Follow care instructions for best results.


