
Ironing on chenille patches is a quick and easy way to add a personal touch to your clothing, backpacks, and more. These soft, fuzzy patches can instantly elevate your style and showcase your personality.
In this article, we’ll guide you through ironing on chenille patches, ensuring a secure and long-lasting attachment. Whether you’re a seasoned DIY enthusiast or a novice looking to add flair to your wardrobe, mastering this technique will allow you to customize your belongings easily.
Key Takeaways
- Clean and dry both the chenille patch and the fabric before application.
- Use a measuring tape to position and temporarily pin the patch accurately.
- Heat the iron to the highest temperature suitable for the fabric.
- Protect the patch with a cotton cloth and press firmly with the iron.
- Allow the patch to cool completely before checking the attachment.
What Are Iron-On Chenille Patches?
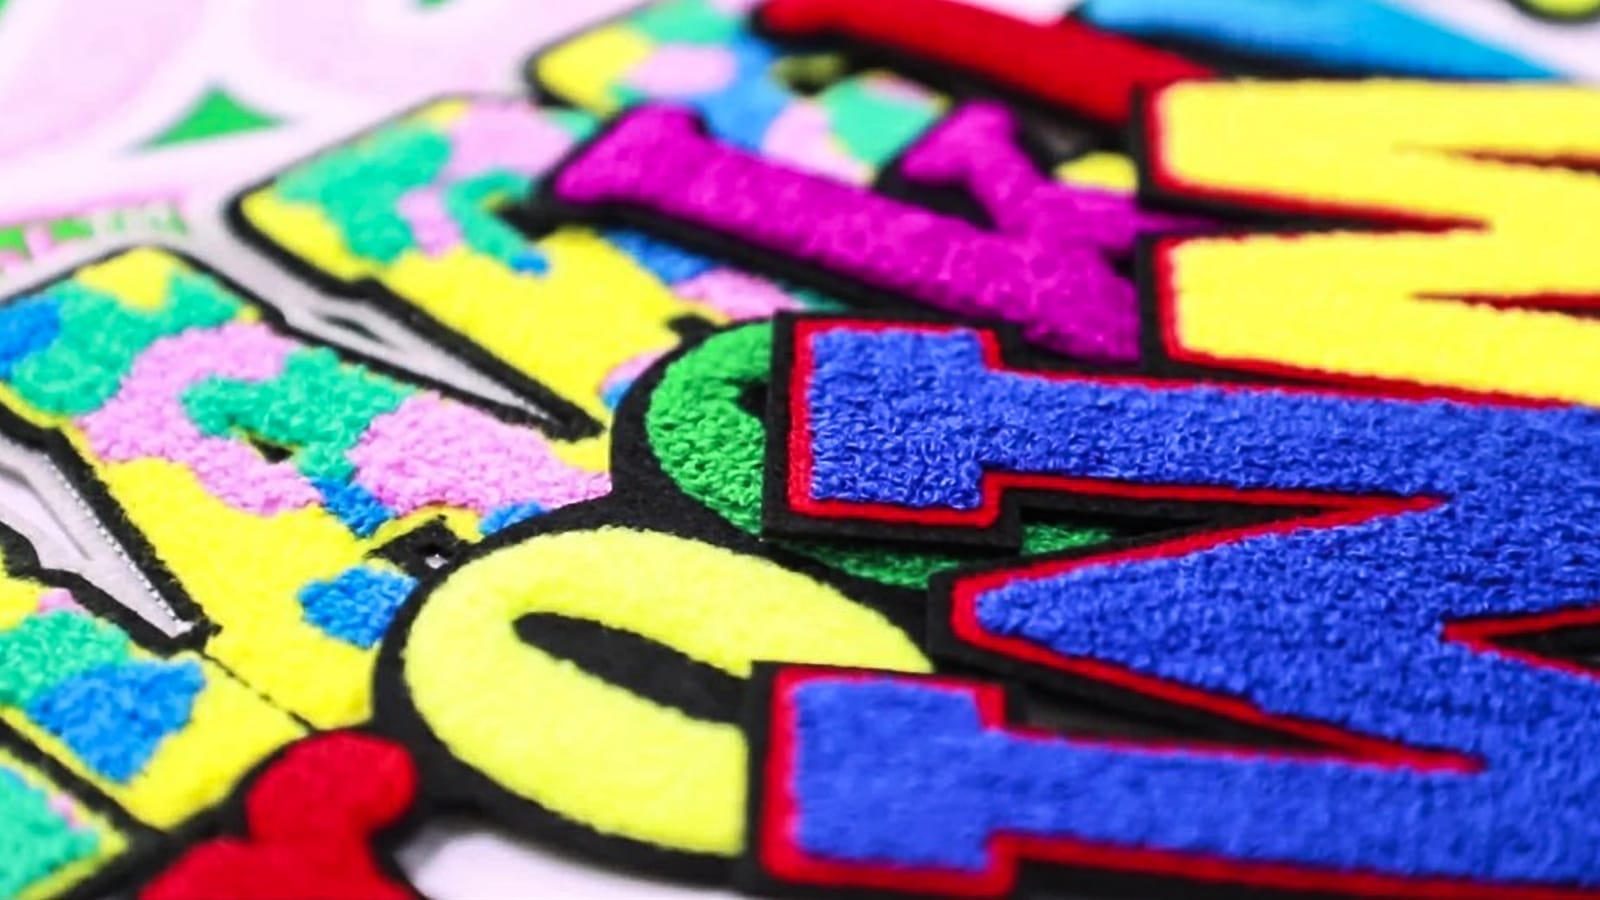
Chenille patches are trendy, fuzzy-textured badges often seen on varsity jackets. They symbolize achievements in sports or academics.
These patches boast a unique texture created by twisting yarns and are backed with a stiffened felt for durability.
You can customize chenille patches in various designs and colors, allowing for bold personal expression while ensuring they remain flexible and comfortable over time.
Preparations Before Ironing On Chenille Patches
Before ironing on chenille patches, carefully decide on the patch’s position to ensure it enhances the garment’s overall look.
Clean and dry both the patch and the fabric thoroughly.
Position the patch using a measuring tape for accurate placement.
Flatten the surface by stretching the fabric to eliminate creases.
Pin the patch temporarily to prevent slipping during the application process.
How to Iron on Chenille Patches: A Step-by-Step Tutorial
Let’s get started with ironing on your chenille patch by following these simple steps.
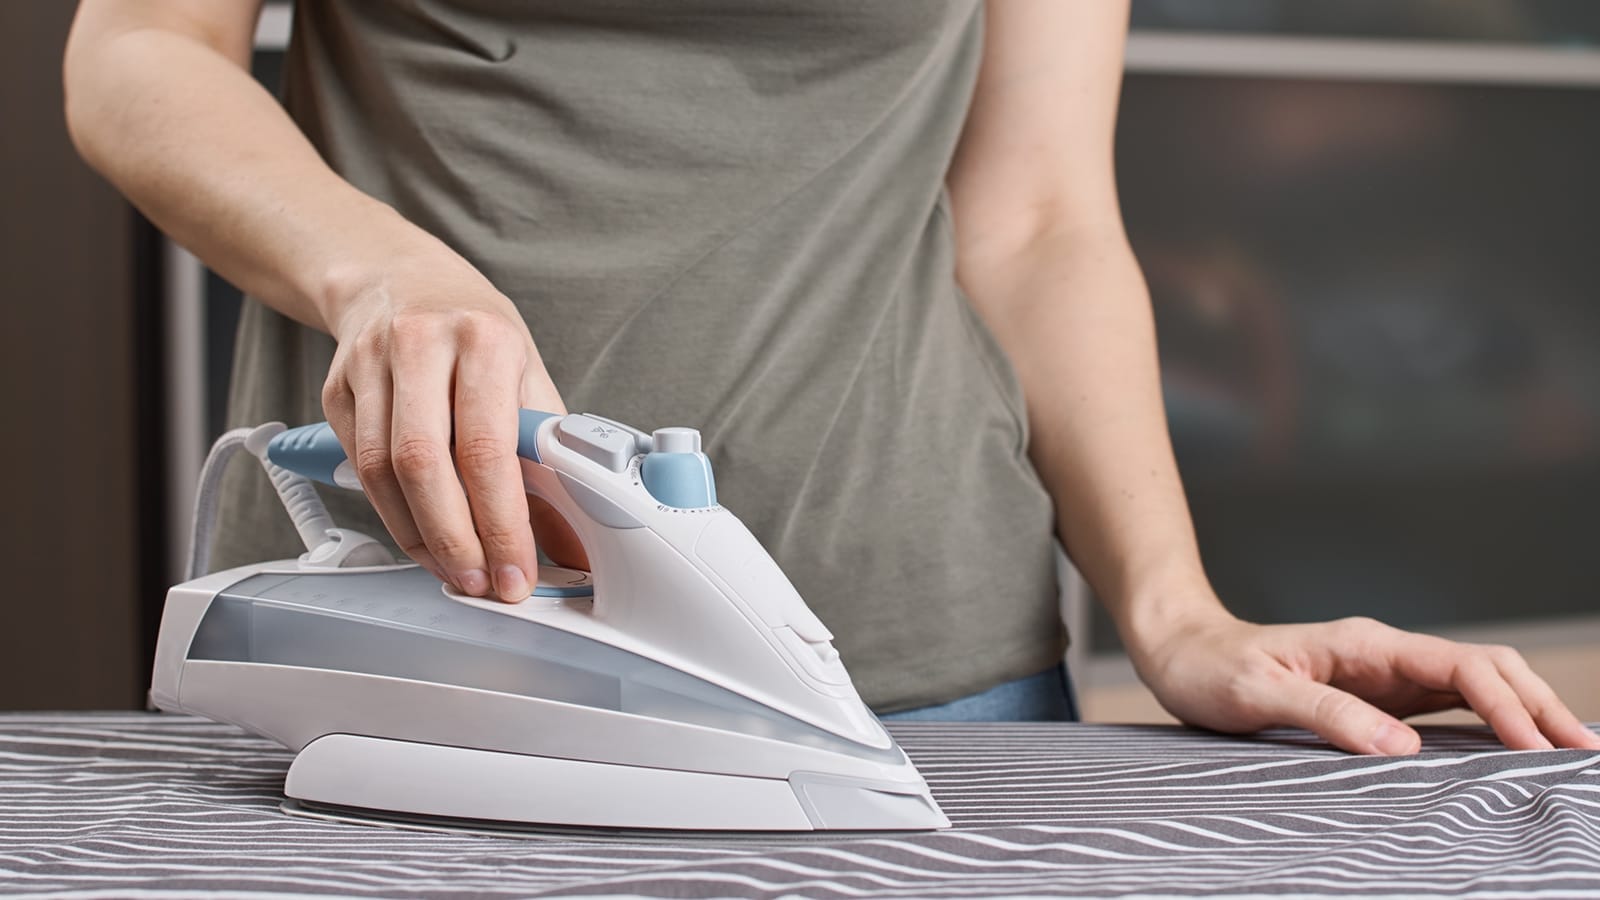
Step 1: Heat the Iron
Wondering how to get started with ironing on your chenille patch?
First, heat the iron to a temperature suitable for your fabric to ensure optimal adhesion. Allow it to preheat until it’s scorching hot.
Use protective gloves to handle the hot iron and avoid burns.
Make sure the iron is evenly heated for uniform pressure and effective adherence before moving to the next step.
Step 2: Place the Patch
Choose the desired spot on the garment for your chenille patch, ensuring it’s visually appealing and free of seams or pockets.
For accurate placement, measure and mark the patch’s corners. Make sure the fabric is clean and dry.
Secure the patch temporarily with pins to prevent shifting. Flatten the area where the patch will be placed to eliminate any creases.
Step 3: Press the Patch
Place a cotton cloth over the chenille patch to protect it from direct heat.
Use a hot iron, pressing the patch for 10-15 seconds.
Repeat this process until the adhesive secures the patch.
Step 4: Cooling and Checking
After ironing, let the chenille patch cool for at least 30 seconds to ensure the adhesive sets properly.
Once cooled, gently check the patch’s edges to confirm it’s securely attached. If any edges lift, briefly reapply the iron.
Inspect for any bubbling or distortion that could indicate overheating.
Avoid washing the garment for 24 hours to maximize adhesion.
Additional Methods to Apply Custom Chenille Patches
If you’re looking for alternative ways to apply your chenille patches, consider sewing, gluing, or using double-sided tape.
For flexibility, you can try Velcro, or combine ironing with sewing for the best results.
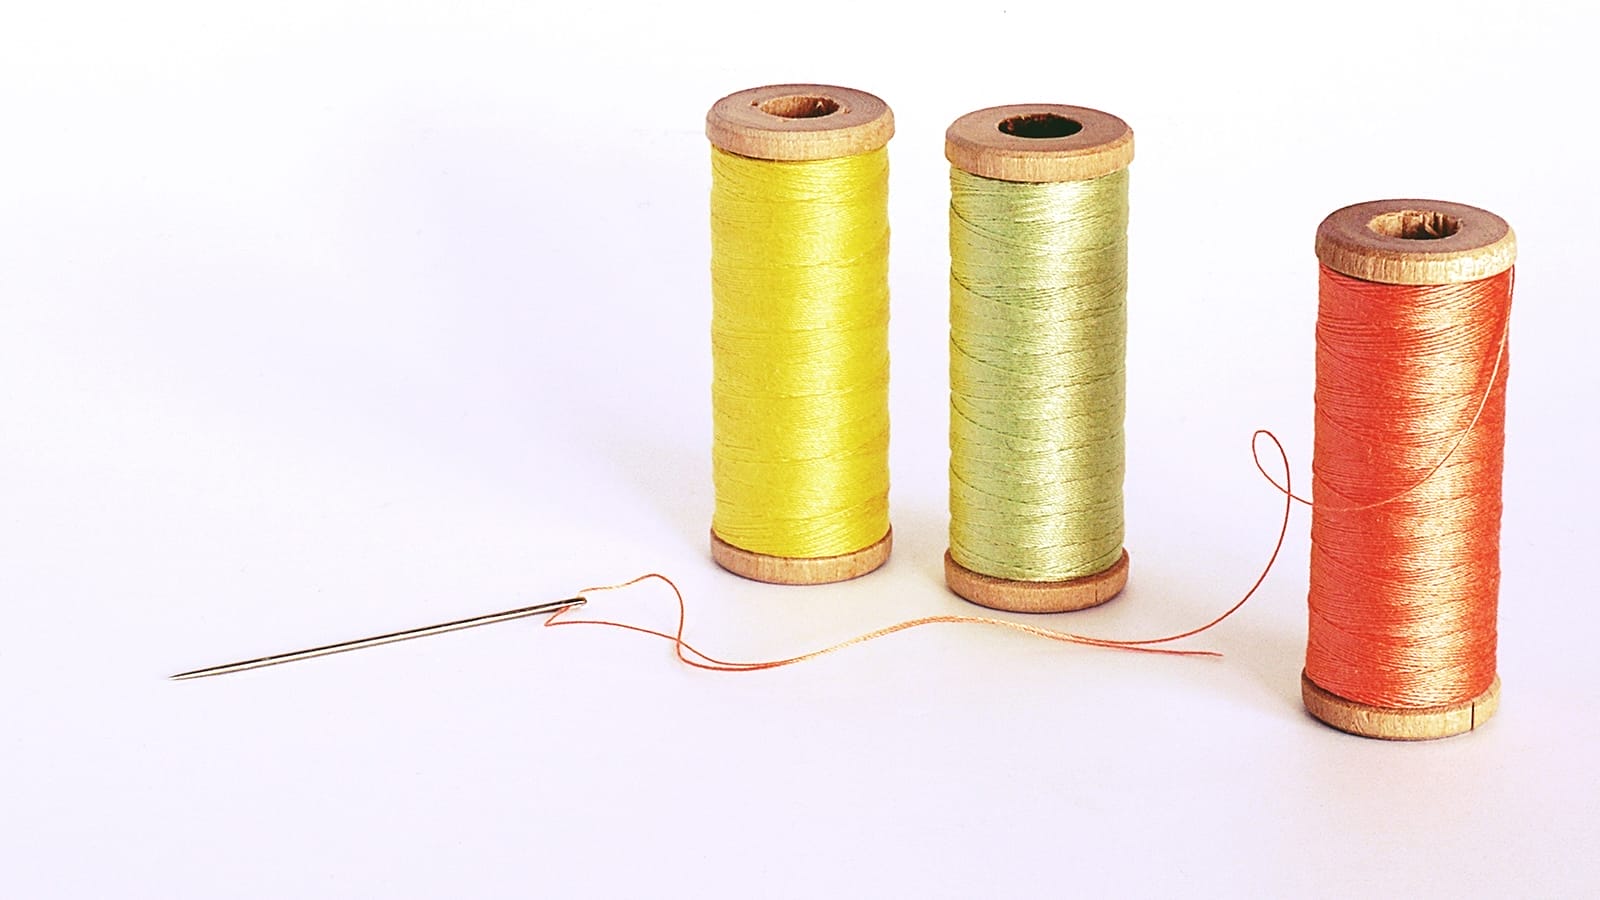
Sewing
For a more durable attachment, consider sewing the chenille patch onto your garment using either hand sewing or a machine.
Unlike iron-on patches, sewing ensures a durable attachment and secure edges.
Choose a thread color that matches the patch or fabric for a seamless look.
Gluing
Gluing can be a practical option when you need a quick and easy way to attach your patches.
First, ensure both the patch and fabric are clean and dry for optimal adhesion.
Apply a thin, even layer of fabric glue to the back of the patch, then press it firmly onto the fabric.
Let the glue dry completely according to the manufacturer’s instructions.
Double-Sided Tape
Applying chenille patches with double-sided tape offers the easiest method, perfect for temporary use or frequent changes.
Make sure the fabric surface is clean and dry to ensure strong adhesion.
This technique is ideal for temporary applications, but it mightn’t withstand repeated washing.
For a more durable solution, consider using permanent methods after positioning the patch with tape.
Velcro
Switching from double-sided tape, Velcro offers a more flexible and reusable method for attaching chenille patches.
Attach one side to the patch and the other to your garment. This lets you personalize your look without permanent adhesion.
While Velcro is durable, frequent washing can affect its longevity, so check it periodically.
Ideal for uniforms or accessories, Velcro provides easy customization.
Best Method: Ironing + Sewing
Combining ironing with sewing is your best bet to achieve the most durable and long-lasting attachment for chenille patches.
Start by ironing on chenille patches using heat to secure them quickly.
Then, reinforce the edges by sewing for added durability.
Ensure the patch is cool and properly adhered to before stitching.
This method is ideal for high-movement areas needing extra security.
Troubleshooting Common Issues
It’s frustrating when your chenille patches aren’t sticking, peeling, or causing fabric damage.
Ensure your iron’s set to the correct temperature and apply firm, even pressure.
Always check that both the patch and fabric are dry to prevent adhesion issues.
Patches Not Sticking
If your chenille patch isn’t sticking, double-check that your work surface is clean and dry to ensure proper adhesion.
Ensure you use a heat press or iron set to the correct temperature for your fabric.
Always apply chenille patches with a pressing cloth to avoid direct heat.
If needed, increase the pressing time or heat slightly for better results.
Fabric Damage
Test a small, hidden area with the iron first to ensure your fabric doesn’t get damaged during the patching process. This helps check heat tolerance.
Always wear a protective cloth to prevent fabric damage against direct heat. Adjust the iron’s temperature accordingly and follow the recommended pressing times.
If damage occurs, evaluate the extent and consider fabric repair solutions.
Patch Peeling
Patch peeling often stems from improper surface preparation or insufficient heat and pressure during application.
Ensure the fabric is clean and dry before applying. Use enough heat and pressure to melt the adhesive properly. Avoid using overly thick protective cloths.
Let the patch cool completely before handling. Consider reinforcing with sewing for added durability, especially in high-movement areas.
Conclusion
You’re now ready to iron on your chenille patches with confidence. Just follow the steps for preparation and ironing, and you’ll get a secure and stylish attachment.
If you encounter any issues, don’t hesitate to try alternative methods or revisit the troubleshooting section.
With a bit of care and patience, your garments will look fantastic with vibrant chenille patches.
Enjoy your newly personalized items!
Explore more patch ideas at the Accessories-Wholesaler blog! Find your favorite iron-on patches at Accessories-Wholesaler!
FAQs
How Long to Heat Press Chenille Patches?
You should heat press chenille patches for about 15 seconds. Apply even pressure and keep the iron moving to avoid scorching. Remember to use a fabric barrier to protect the patch.
Can Chenille Be Ironed?
Yes, you can iron chenille, but you’ve got to be careful. Always use a protective cloth between the iron and the chenille to prevent damage, and test a small area first to check heat tolerance.
What Temperature Do I Apply Chenille Patches?
For chenille patches, set your iron to 320°F (160°C). Make sure it’s preheated to that temperature. To prevent scorching, use a fabric barrier like a tea towel. Apply even pressure for about 15 seconds.
What to Put Chenille Patches On?
You can put chenille patches on sweatshirts, varsity jackets, hoodies, t-shirts, vests, letterman jackets, work shirts, uniforms, tees, hats, and bags. Just choose the item you want to customize and get creative!


